日常开发中,注册登录可能是最常见的功能需求了。本文介绍springboot如何使用redis来保存session数据,使用Interceptor来拦截网络请求,实现注册登录功能。
session介绍
session和cookie都是浏览器和服务器交互过程中,携带、保存数据的一种方式。cookie数据全部保存在浏览器,安全性较低。session则是把客户端编号,每个客户端都有一个sessionID,通过cookie保存。sessionID对应的具体数据则保存在服务端。这样做可以提高数据安全性。
为什么要用redis
springboot储存session数据的方式有很多种,但最常用的还是redis。主要是因为redis作为独立的数据库,当你的springboot在很多台服务器上运行的时候可以共享数据。比如用户在A服务器上登录,当他的网络请求被负载均衡路由到B服务器的时候,依然可以通过redis进行登录验证。
另外,redis本身的高性能、高效率也比其他数据库更适合小数据量的高频率读写。
Springboot Interceptor拦截器介绍
Interceptor拦截器是springboot框架中常用的一个类,可以自由配置某些规则的URL、某些自定义注解标记的controller或method等的请求,必须经过该拦截器。这样就可以灵活的给springboot中的网络请求分类、标记,从而对应不同的拦截器实现不同的功能。比如:登录验证、权限验证、日志记录、访问频率控制等等。
注册登录功能代码
project代码基于本专栏前面的代码,如果你对redis的使用不太熟悉,可以参考Springboot整合Redis和redis常用操作演示 。
1. maven引入相关依赖包
<dependency>
    <groupId>org.springframework.session</groupId>
    <artifactId>spring-session-data-redis</artifactId>
</dependency>
完整pom.xml的代码如下:
<?xml version="1.0" encoding="UTF-8"?>
<project xmlns="http://maven.apache.org/POM/4.0.0" xmlns:xsi="http://www.w3.org/2001/XMLSchema-instance"
         xsi:schemaLocation="http://maven.apache.org/POM/4.0.0 https://maven.apache.org/xsd/maven-4.0.0.xsd">
    <modelVersion>4.0.0</modelVersion>
    <parent>
        <groupId>org.springframework.boot</groupId>
        <artifactId>spring-boot-starter-parent</artifactId>
        <version>2.5.4</version>
        <relativePath/> <!-- lookup parent from repository -->
    </parent>
    <groupId>com.coderbbb</groupId>
    <artifactId>book-1</artifactId>
    <version>0.0.1-SNAPSHOT</version>
    <name>book-1</name>
    <description>book-1</description>
    <properties>
        <java.version>11</java.version>
    </properties>
    <dependencies>
        <dependency>
            <groupId>org.springframework.boot</groupId>
            <artifactId>spring-boot-starter-web</artifactId>
        </dependency>
        <dependency>
            <groupId>org.springframework.boot</groupId>
            <artifactId>spring-boot-starter-thymeleaf</artifactId>
        </dependency>
        <dependency>
            <groupId>org.mybatis.spring.boot</groupId>
            <artifactId>mybatis-spring-boot-starter</artifactId>
            <version>2.2.0</version>
        </dependency>
        <dependency>
            <groupId>com.github.pagehelper</groupId>
            <artifactId>pagehelper-spring-boot-starter</artifactId>
            <version>1.4.0</version>
        </dependency>
        <dependency>
            <groupId>org.springframework.boot</groupId>
            <artifactId>spring-boot-starter-data-redis</artifactId>
        </dependency>
        <dependency>
            <groupId>org.apache.commons</groupId>
            <artifactId>commons-pool2</artifactId>
            <version>2.11.1</version>
        </dependency>
        <dependency>
            <groupId>org.springframework.session</groupId>
            <artifactId>spring-session-data-redis</artifactId>
        </dependency>

        <dependency>
            <groupId>org.projectlombok</groupId>
            <artifactId>lombok</artifactId>
            <optional>true</optional>
        </dependency>
        <dependency>
            <groupId>mysql</groupId>
            <artifactId>mysql-connector-java</artifactId>
            <scope>runtime</scope>
        </dependency>
        <dependency>
            <groupId>org.springframework.boot</groupId>
            <artifactId>spring-boot-starter-test</artifactId>
            <scope>test</scope>
        </dependency>
    </dependencies>

    <build>
        <plugins>
            <plugin>
                <groupId>org.springframework.boot</groupId>
                <artifactId>spring-boot-maven-plugin</artifactId>
            </plugin>
        </plugins>
    </build>

</project>
2. 创建自定义注解,标记需要登录验证的请求
创建一个名为WebAuth的自定义注解,代码如下:
package com.coderbbb.book1.config;

import java.lang.annotation.*;

/**
 *
 * @author coderbbb
 * @date 2020-03-27
 */
@Documented
@Inherited
@Target(ElementType.METHOD)
@Retention(RetentionPolicy.RUNTIME)
public @interface WebAuth {

}
3. 创建Intercept拦截器,拦截需要登录验证的请求
创建一个名为AccessInterceptor的拦截器,在拦截器中判断web请求对应的controller method是否标记有自定义注解WebAuth,如果有,则读取session信息,看用户是否已经登录。代码如下:
package com.coderbbb.book1.config;

import org.springframework.stereotype.Component;
import org.springframework.web.method.HandlerMethod;
import org.springframework.web.servlet.HandlerInterceptor;

import javax.servlet.http.HttpServletRequest;
import javax.servlet.http.HttpServletResponse;
import javax.servlet.http.HttpSession;

@Component
public class AccessInterceptor implements HandlerInterceptor {

    @Override
    public boolean preHandle(HttpServletRequest request, HttpServletResponse response, Object handler) throws Exception {

        if (!(handler instanceof HandlerMethod)) {
            return true;
        }


        WebAuth webAuth = ((HandlerMethod) handler).getMethodAnnotation(WebAuth.class);
        if(webAuth!=null){
            //需要登录验证

            HttpSession httpSession = request.getSession();
            if(httpSession==null || httpSession.getAttribute("user")==null){
                //用户没有登录,所以跳转到登录页面
                response.sendRedirect("/login");
                return false;
            }
            String user = (String)httpSession.getAttribute("user");
            //TODO:查询数据库,看user是否存在,是否可以正常访问网站,如果不行,则跳转登录

            return true;
        }

        return true;
    }
}
然后,我们需要把该拦截器注册到springboot中,类似操作专栏前面的文章有讲过,这里贴一下代码:

代码中,BaseInterceptor的代码是之前文章用的,你不用可以删掉,注意保留上图红色框中的代码即可。代码如下:
package com.coderbbb.book1.config;

import org.springframework.beans.factory.annotation.Autowired;
import org.springframework.context.annotation.Configuration;
import org.springframework.web.servlet.config.annotation.InterceptorRegistry;
import org.springframework.web.servlet.config.annotation.WebMvcConfigurer;

@Configuration
public class WebConfig implements WebMvcConfigurer {

    @Autowired
    private BaseInterceptor baseInterceptor;
    @Autowired
    private AccessInterceptor accessInterceptor;

    @Override
    public void addInterceptors(InterceptorRegistry registry) {
        registry.addInterceptor(baseInterceptor).excludePathPatterns("*.ico");

        registry.addInterceptor(accessInterceptor);
    }
}
4. 在需要登录验证的请求上标记WebAuth
创建一个springboot web请求,并标记WebAuth注解,代码如下:
package com.coderbbb.book1;

import com.coderbbb.book1.config.WebAuth;
import org.springframework.stereotype.Controller;
import org.springframework.ui.Model;
import org.springframework.web.bind.annotation.RequestMapping;
import org.springframework.web.bind.annotation.RequestMethod;

import javax.servlet.http.HttpServletRequest;
import javax.servlet.http.HttpSession;

@Controller
public class HelloController {

    @WebAuth
    @RequestMapping(value = "/hello", method = RequestMethod.GET)
    public String hello(Model model, HttpServletRequest request){
        model.addAttribute("msg","这是我开发的第一个HTML网页");

        HttpSession httpSession = request.getSession();
        model.addAttribute("user",httpSession.getAttribute("user"));

        return "index";
    }

}
5. 创建登录页面
新建一个controller,捕获/login路径的请求,返回登陆页面HTML。然后再创建一个登录页面的HTML网页,让用户填写账号密码。
controller代码如下:
package com.coderbbb.book1.controller;

import org.springframework.stereotype.Controller;
import org.springframework.web.bind.annotation.RequestMapping;
import org.springframework.web.bind.annotation.RequestMethod;

@Controller
public class LoginController {

    @RequestMapping(value = "/login",method = RequestMethod.GET)
    public String loginPage(){
        return "login";
    }
}
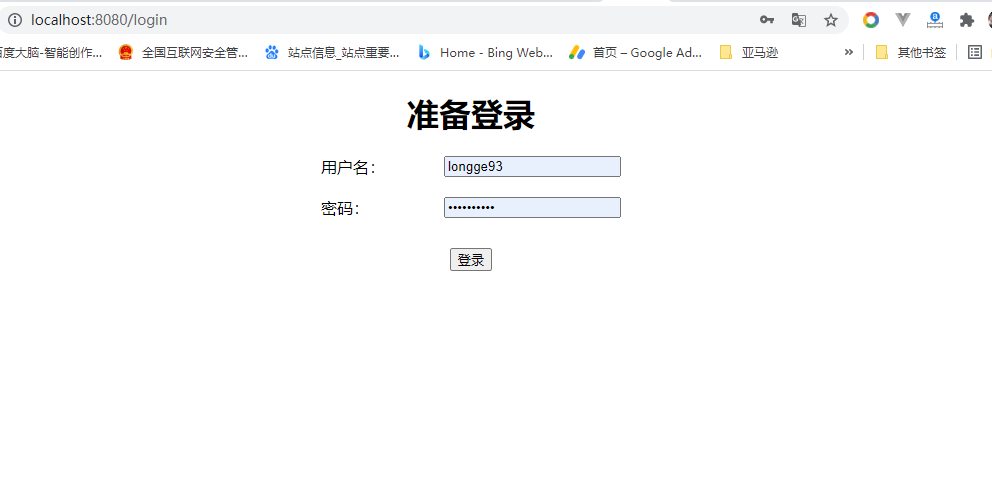
login.html登录页面代码如下:
<!DOCTYPE html>
<html lang="en">
<head>
    <meta charset="UTF-8">
    <title>登陆页面</title>
</head>
<body>
    <h1 style="text-align: center;">准备登录</h1>

    <div style="margin: 0 auto;width: 300px;">

        <form action="/loginPost" method="post">

            <div style="display: flex;justify-content: space-between;">
                <label for="username">
                    用户名:
                </label>
                <input type="text" id="username" name="username" placeholder="请输入用户名" />
            </div>

            <div style="display: flex;justify-content: space-between; margin-top: 20px;">
                <label for="password">
                    密码:
                </label>
                <input type="password" id="password" name="password" placeholder="请输入密码" />
            </div>

            <button type="submit" style="display: block;margin: 30px auto;">登录</button>
        </form>

    </div>
</body>
</html>
6. 创建一个RestController接收登录表单提交的数据
在登录页面点击登录按钮后,上面的代码提交表单数据到/loginPost路径,我们需要新建一个controller来接收这些数据。拿到前端提交的用户名、密码数据后,在实际项目中,我们需要去数据库验证,看看是否正确,如果正确则给session中添加值,错误则返回错误信息给用户。这里为了演示方便,就不验证了,默认所有的账号密码都是合法的。代码如下:
package com.coderbbb.book1.controller;

import org.springframework.web.bind.annotation.RequestMapping;
import org.springframework.web.bind.annotation.RequestMethod;
import org.springframework.web.bind.annotation.RequestParam;
import org.springframework.web.bind.annotation.RestController;

import javax.servlet.http.HttpServletRequest;
import javax.servlet.http.HttpSession;

@RestController
public class LoginPostController {

    @RequestMapping(value = "/loginPost", method = RequestMethod.POST)
    public String loginPost(
            @RequestParam(value = "username")String username,
            @RequestParam(value = "password")String password,
            HttpServletRequest request
    ){
        System.out.println("username:" + username + "###password:" + password);

        //TODO:查询数据库,验证用户名和密码是否合法!!!!!

        //假如,用户名和密码都是合法的,则保存user信息到session中。
        HttpSession httpSession = request.getSession();
        httpSession.setAttribute("user",username);

        return "login success!";
    }
}
效果演示
逻辑是这样的:当我们请求/hello,因为改路径我们标记了WebAuth,需要登录验证。拦截器拦截该请求后,因为没有登录,所以没有session信息,会自动重定向到/login页面,让我们登录。
当我们输入用户名、密码,成功登录后,相关用户信息已经保存到了session中(session信息保存在redis中),我们再次请求/hello将能正常展示网页内容。

登录成功,再次访问/hello,就能正常展示内容啦!

一些细节介绍:
- 如果你的代码完全正确的话,在你成功登录后,即使你重启你的springboot项目,再次打开
/hello,登录信息依然是在的,无需重新登录。反之,如果你的代码有问题,那么当你重启springboot后,依然需要再次登录。这是因为springboot默认的session信息是保存在内存中的,重启后就没了。保存在redis中,则没有这个问题。
登录过期时间设置
网上有很多设置session+redis登录的过期时间的教程,往往都很复杂,需要写很多代码,各种继承、依赖……其实只要在application.properties中配置一句话就行了。代码如下:spring.session.timeout=5s,注意值是Duration类型,是一种可以带单位的时间类型(比如,5s代表5秒),不了解的可以百度。